There are many servo testers and even some servo centering tools available on the market. I didn’t find though the one I wanted to have, with selectable 1500/1520µs PWM outputs and also with 760/960µs outputs for helicopter fast tail servos.
The MAK RC Heli Servo Centering Tool may be especially interesting for RC helicopter modellers, due to its fast tail servo PWM output. Of course Flybarless controller unit can be always used to center servos, but I like to mount FBL unit at very end, without bothering about it during the build process.
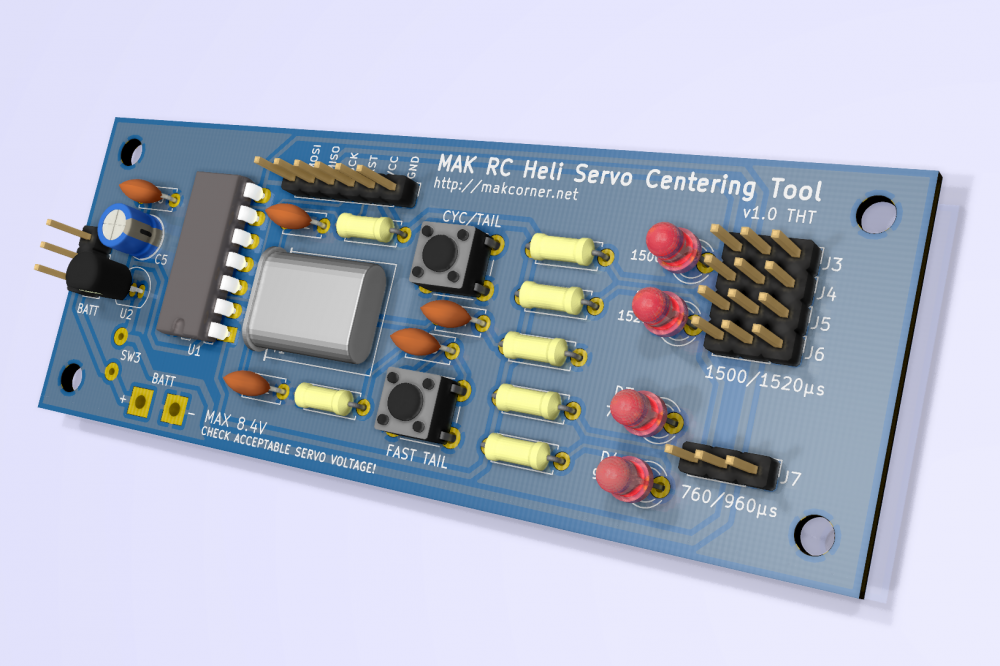
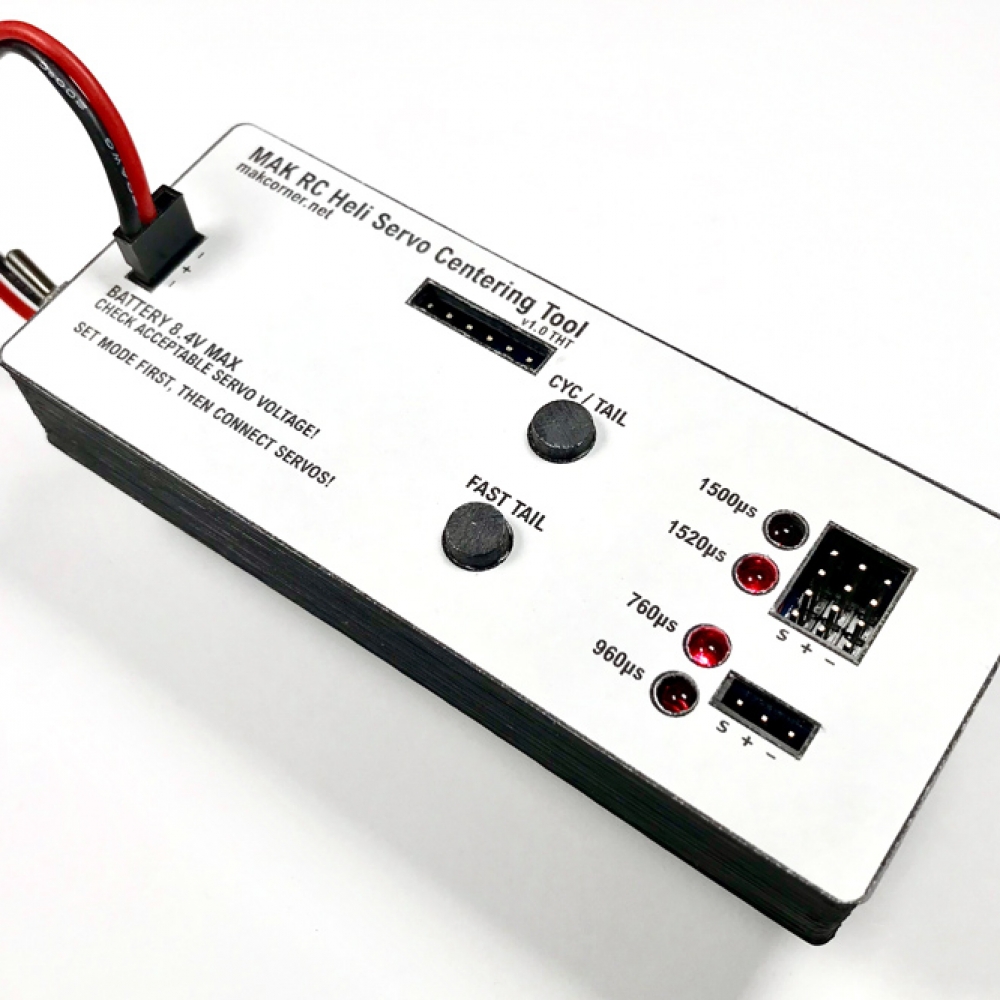
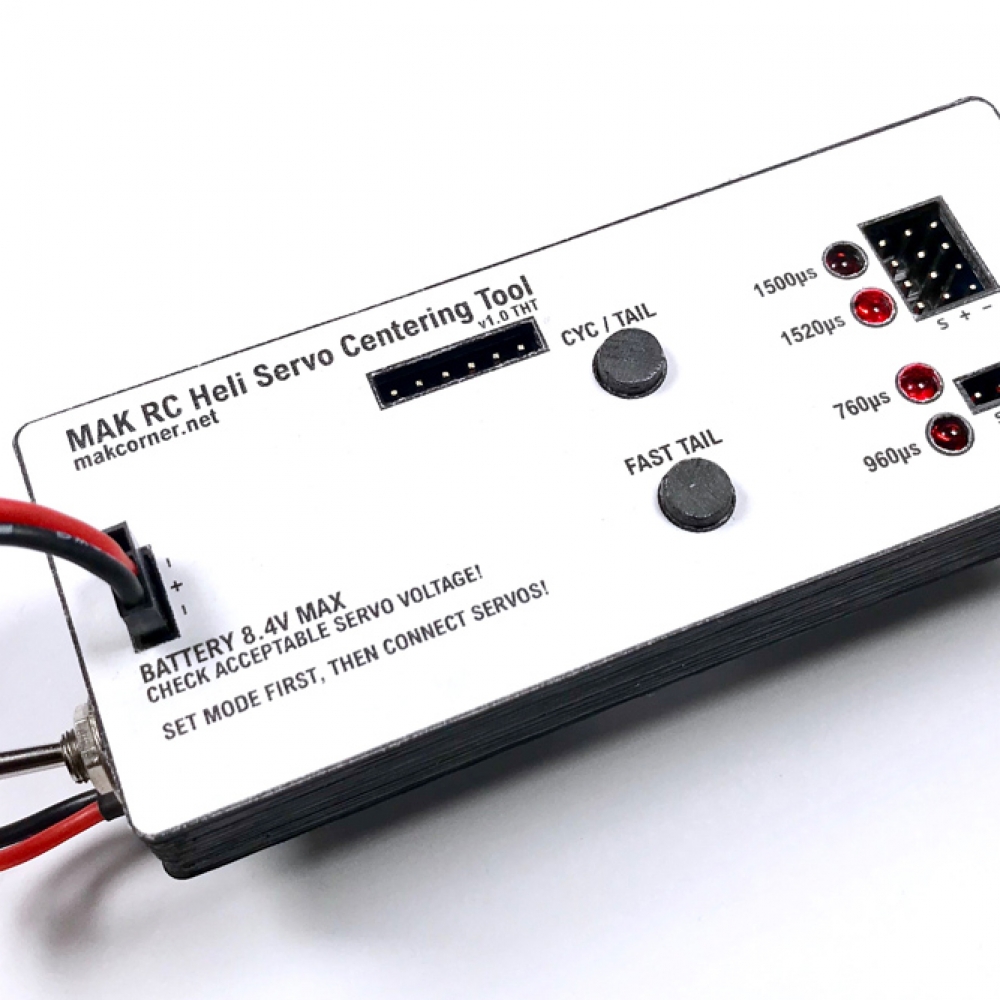
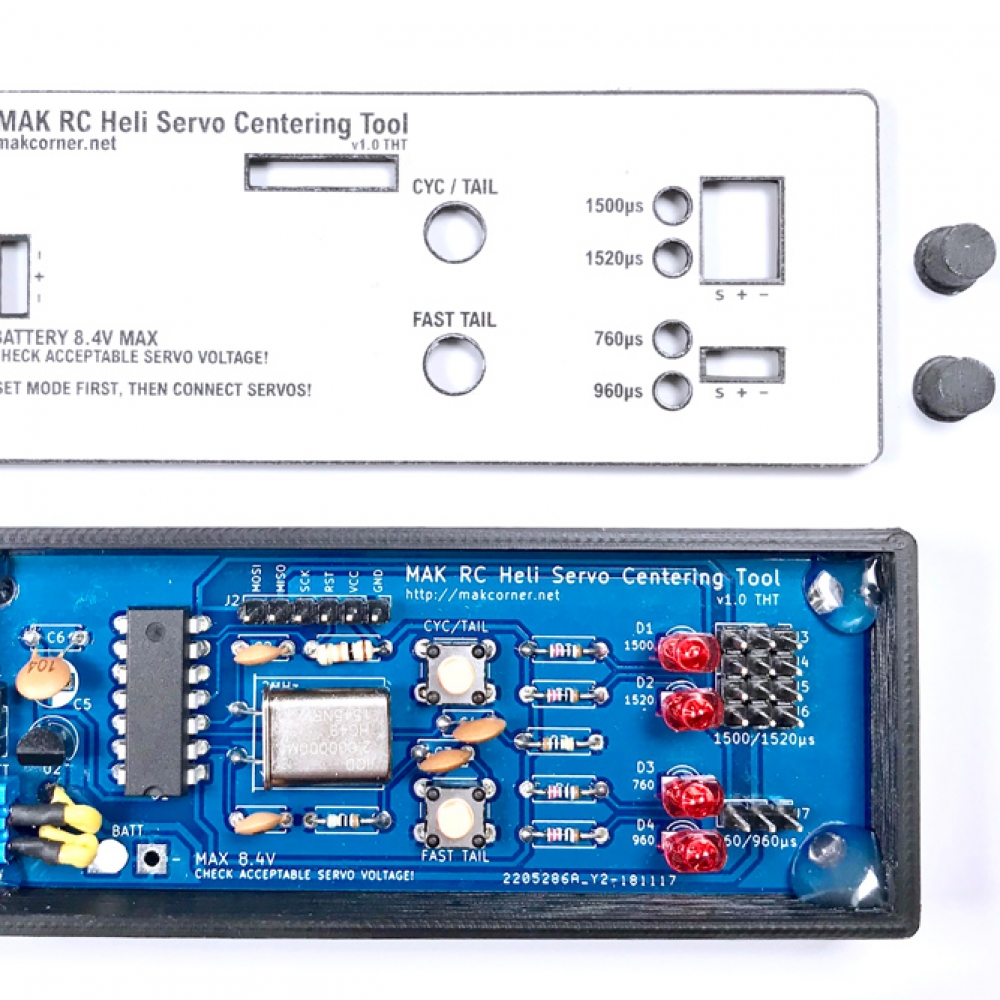
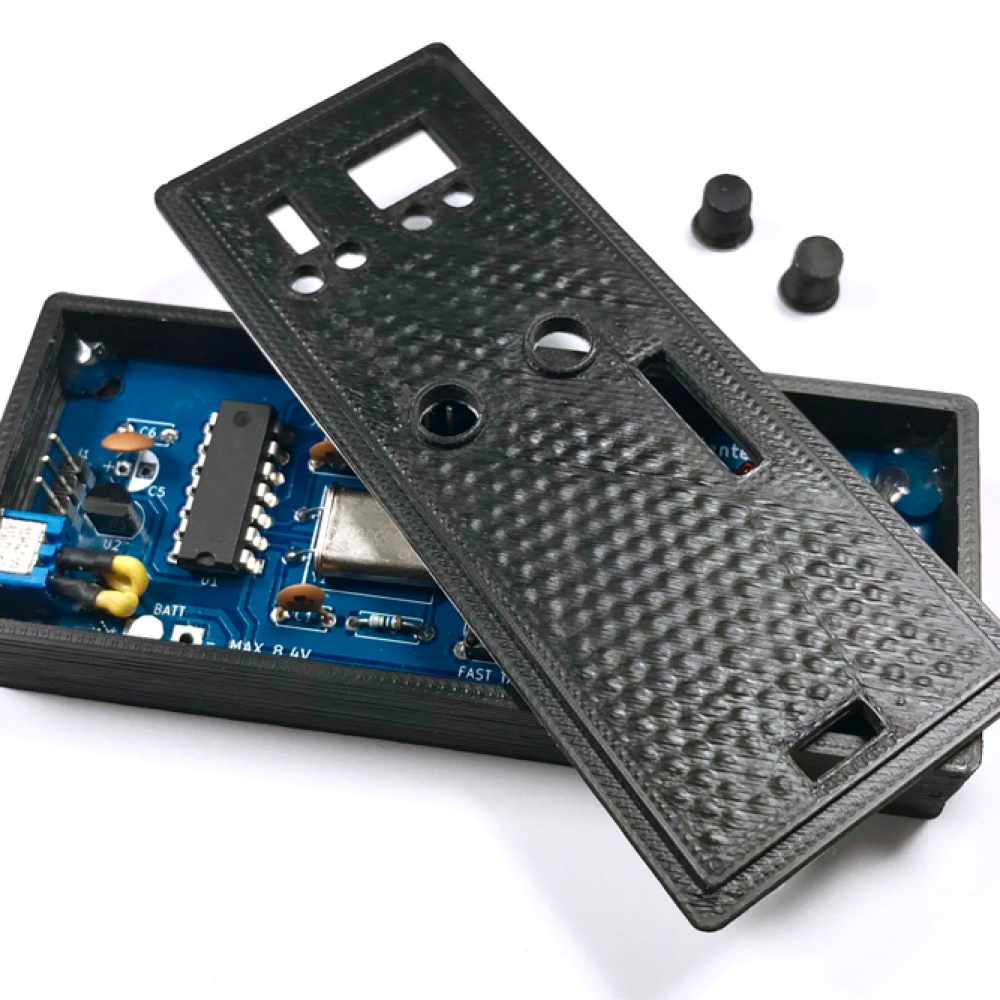
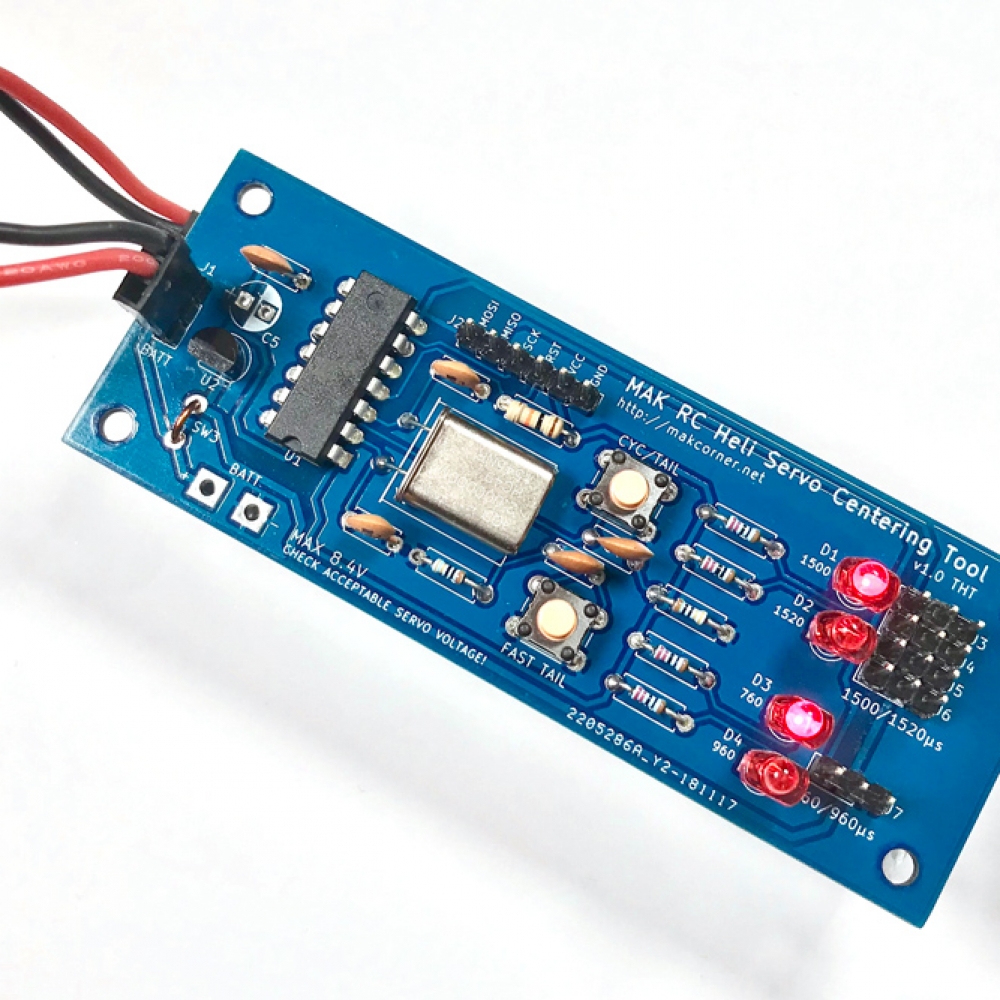
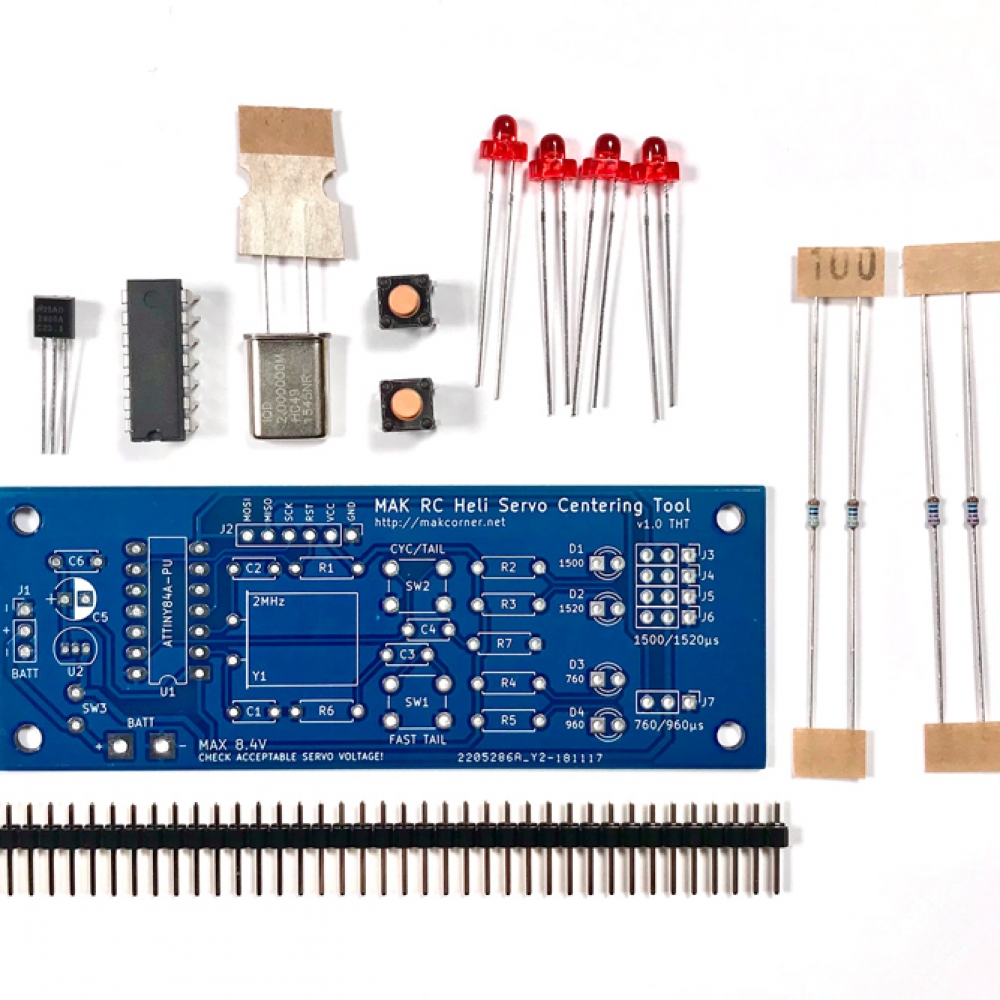
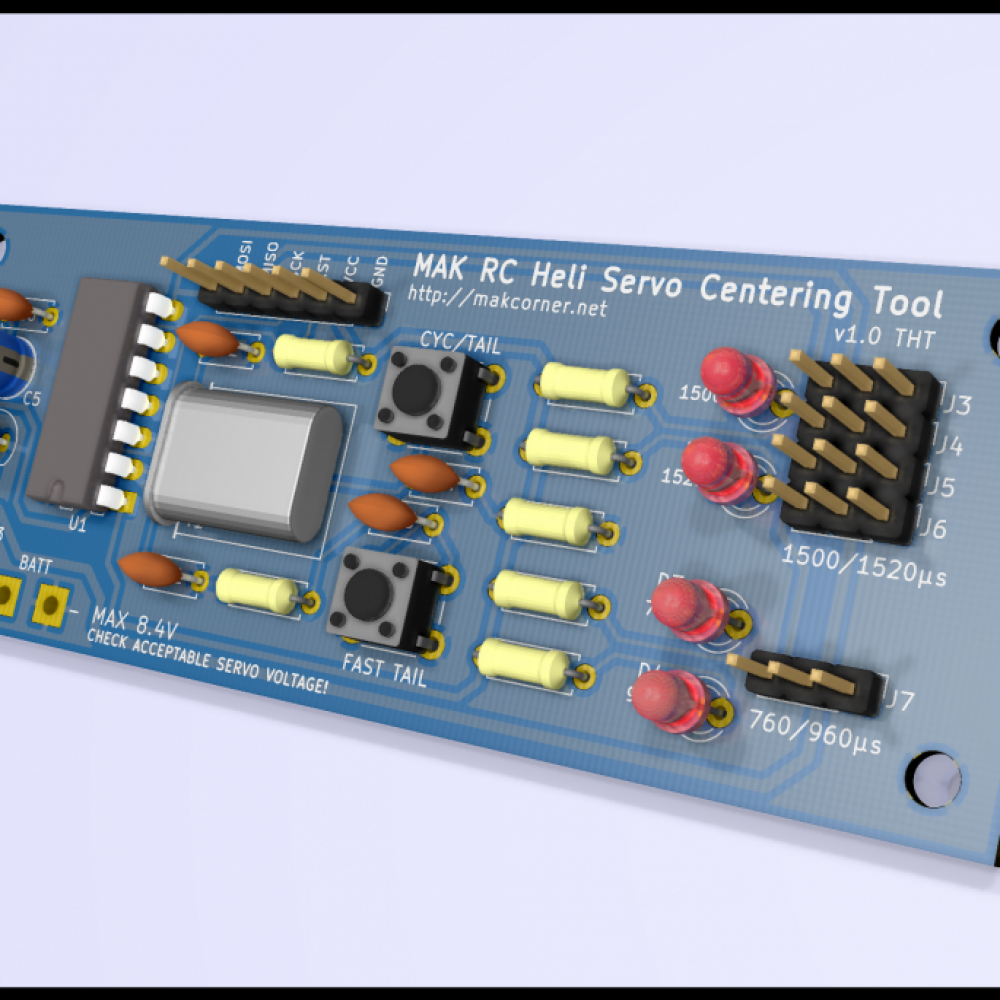
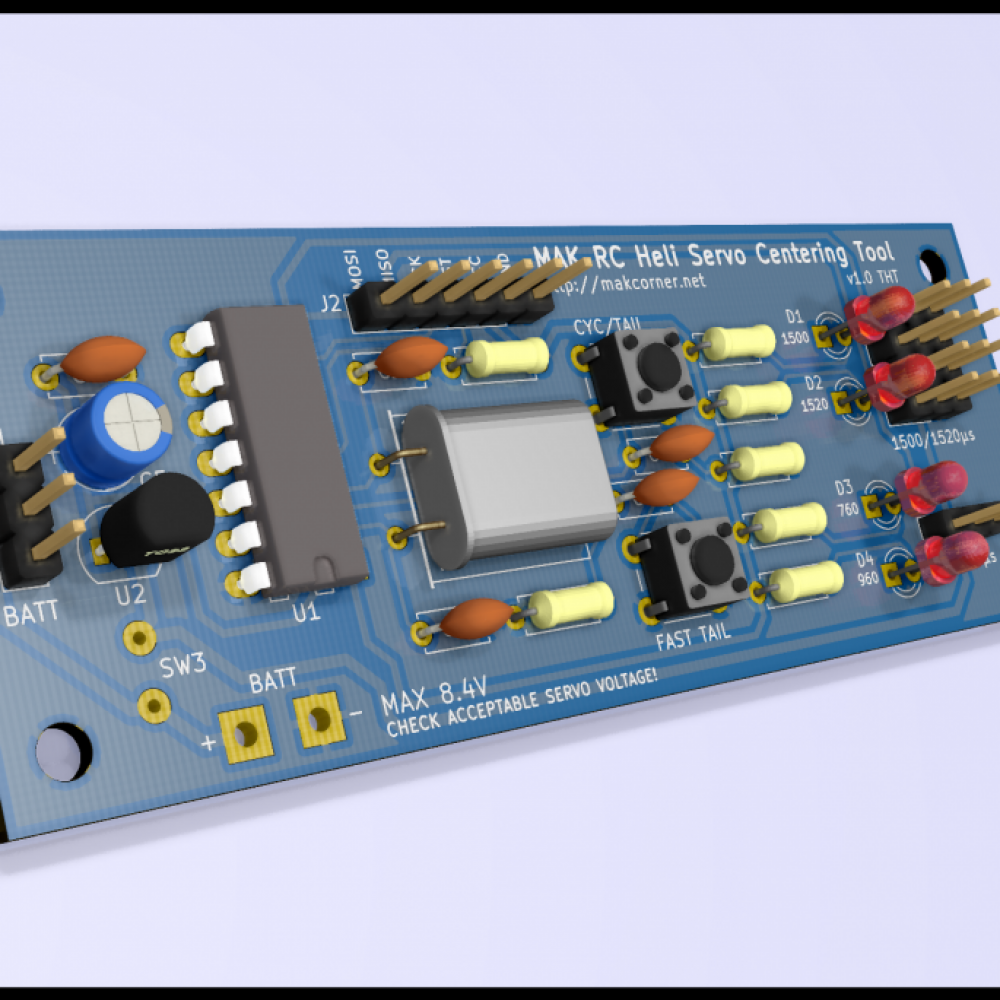
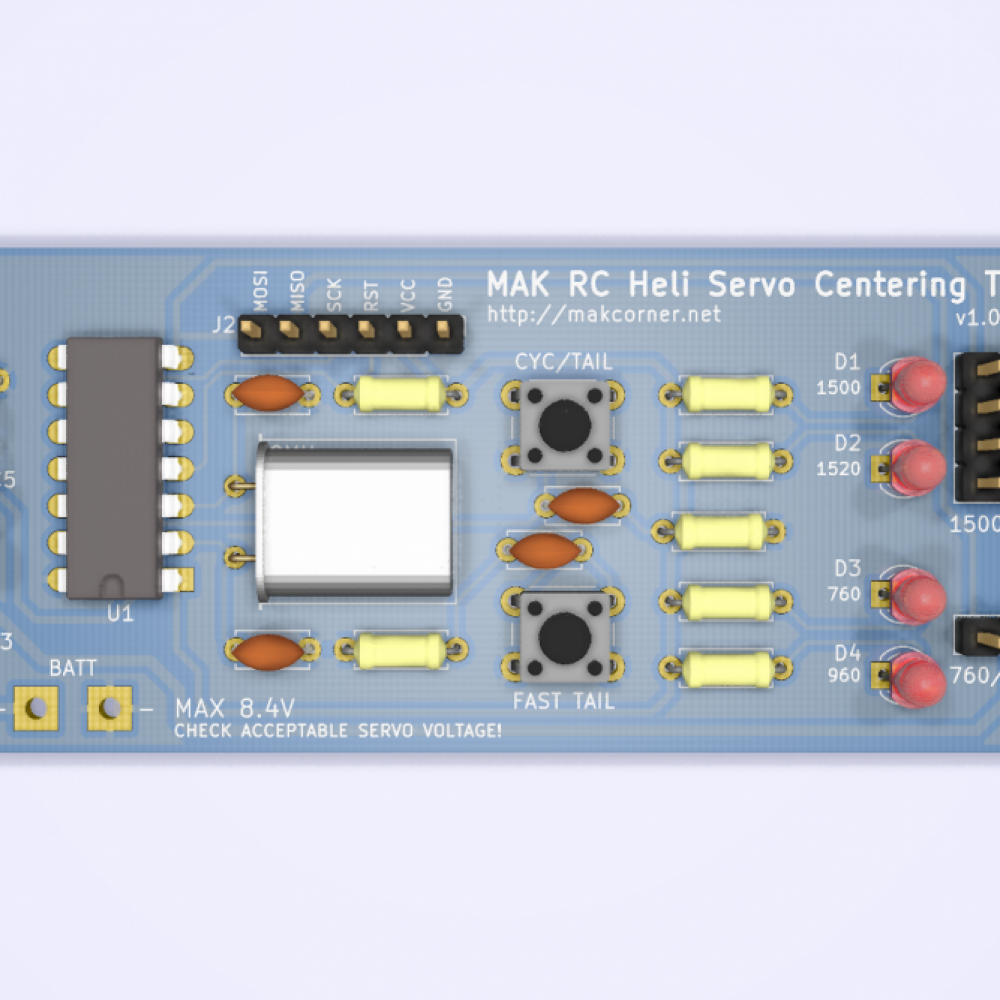
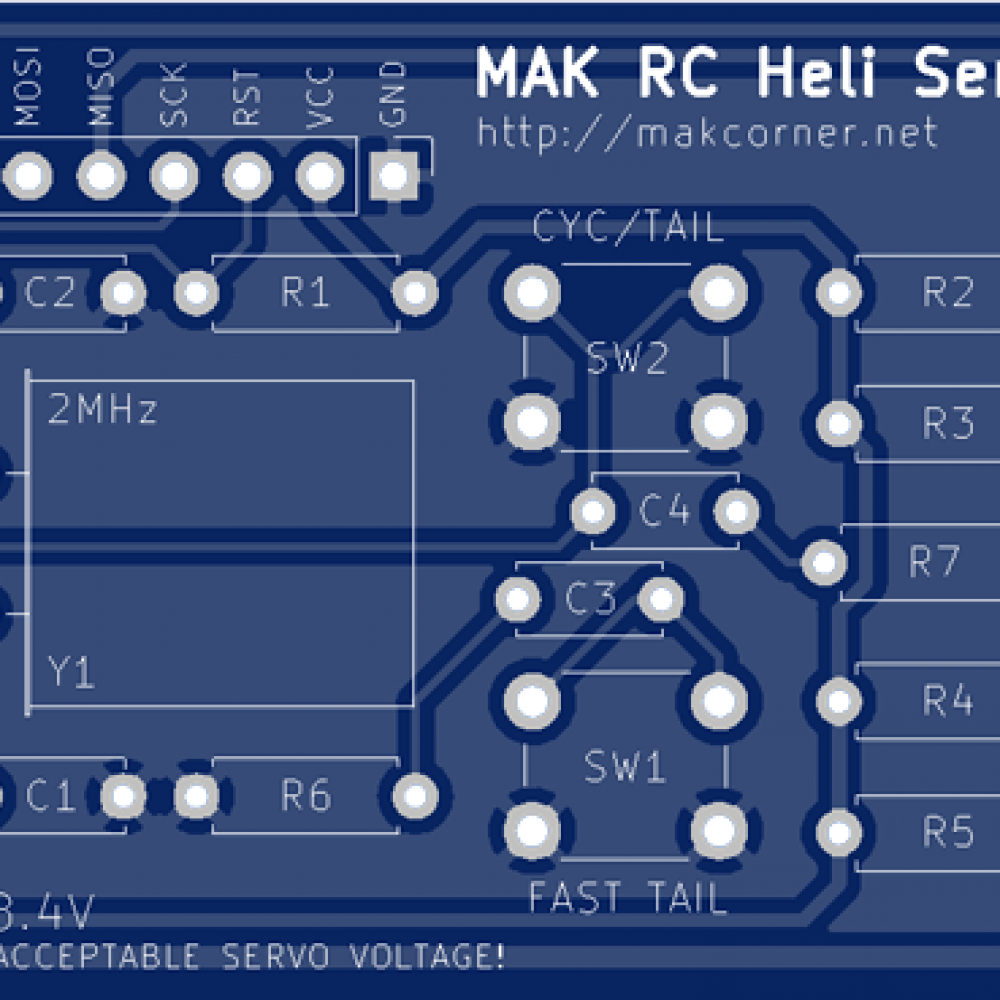
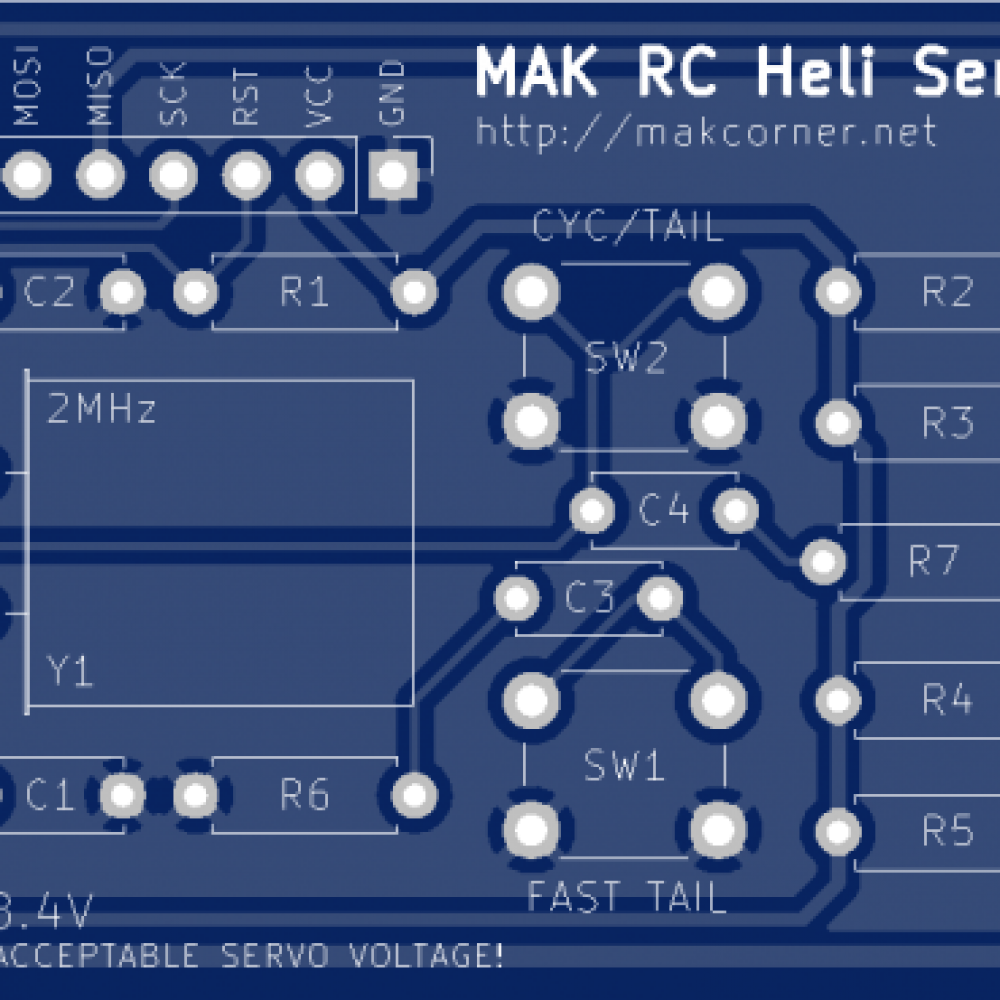
Picture gallery
Features
- selectable 1500/1520µs PWM output ports (x4) for standard servos
- selectable 760/960µs PWM output port for heli fast tail servo
- PWM output resolution 0.5µs
- safe 50Hz refresh rate (no need for higher frequency just to center the servo)
- standard JR-type plug for battery connection
- pads on PCB to solder optional battery connector
- on/off switch pads (to solder optional switch)
- settings stored in non-volatile memory, so the tool will restore your last working modes when powered-up
- operating voltage 4.0-8.4V (i.e. direct 2S LiPo for high voltage servos)
What is servo centering?
Servo needs to be put into its center during RC model build process, to precisely set the length of the pushrods, to reach neutral position of steering control (i.e. ailerons, rudder, helicopter swashplate or tail) .
Servos are controlled by PWM signal, which is nothing else but electric signal with very specific time length, usually in a range of about 1000-2000µs (microseconds), running at 50Hz (50 times per second refresh rate). For most RC gear vendors (like FrSky, Spectrum, JR) the center is exactly at 1500µs. Futaba uses 1520µs and is often considered as a standard – many servo manufactures uses 1520 as a perfect center for their servos.
In RC helicopter world tail control is especially important and requires extremely fast servos, for very quick tail pitch control. To achieve that goal servo manufactures produces fast tail servos, able to work with very high frequencies (and hence react faster).
High frequencies (servo refresh rates) – like 333Hz or 560Hz – require shorter (quicker) PWM frame, to be able to “fit” enough PWM frames one after the other. Quick PWM frames cannot have their center around 1500µs, as they are too short to accommodate related maximum frame length. Thus servo manufactures uses 960µs or even 760µs as a center of fast tail PWM signal.
User manual
- Connect battery (make sure that your servos can operate at given battery voltage).
- Power-on the tool (if you have optional power switch installed).
- Select desired working mode with CYC/TAIL (1500/1520µs) and/or FAST TAIL (760/960µs) buttons depending on type of servos you want to center.
- Connect servos (do not connect servos before proper mode is set; see Safety Warnings below).
- Enjoy perfectly centered servos, without using your FBL unit controller or receiver.
The tool will remember last working modes between power cycles, so there is no need to set it up every time – if you use the same servo types.
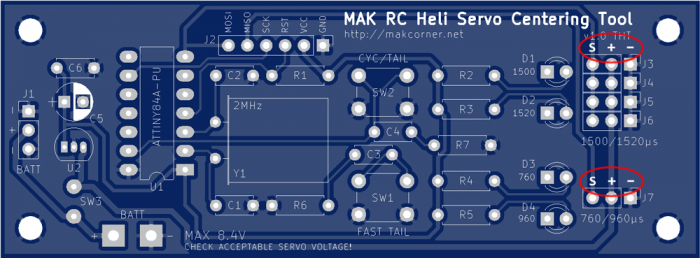
Servo PWM output ports polarization
Unfortunately PWM output pin polarization is not clearly marked on the PCB. It will be corrected in PCB version 1.1, when (if) it will be released. Meanwhile please refer to this picture:
Safety warnings
Standard servos connected to fast tail 760/960µs port and fast tail servos connected to standard 1500/1520µs port will not work. What’s more, wrongly connected servo can get very hot and even permanently damaged. So first set up desired mode, then connect the servo. Never opposite!
Battery voltage provided to the tool is directly powering connected servos, without any voltage regulation. Use battery which allow your servos to operate properly. Especially do not use 2S/8.4V battery to power traditional servos, which usually can handle up to 6V (some servos even up to 5V).
The tool is not providing protection against deep battery discharge, so do not leave it switched-on and unattended. Some battery types (i.e. LiPo) can be extremely dangerous when discharged below certain level. In worse case scenario they can get fire and cause damage to people or property.
Use the MAK RC Heli Servo Centering Tool at your own risk and responsibility.
Bill of Material (BoM) & Cost
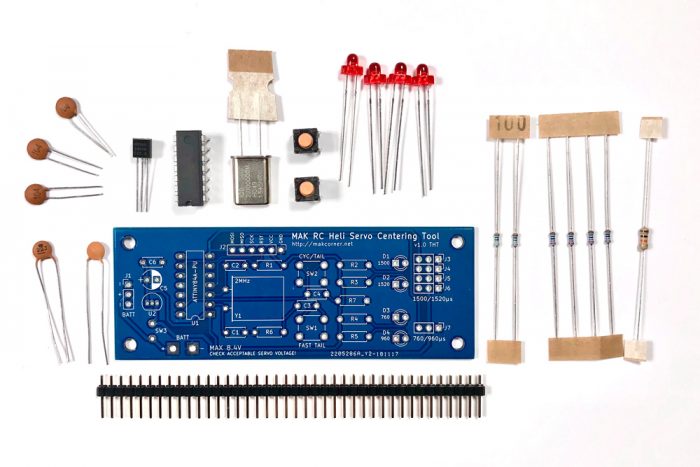
Beside the PCB and 3D printed case you will need ATtiny84A microcontroller, 3.3V voltage regulator, 2MHz crystal oscillator, 4 x LED, 5 x ceramic capacitor, 7 x resistor and 2.54mm pitch single row pin header (one 40 way piece is enough). Parameters accordingly to the BoM table below.
Depends where you buy, cost of electronic components should not exceed US$10.
The PCB itself can cost even below US$5, but it depends how many and where you order, and also how expensive the delivery is. It may make sense to combine PCB manufacturing order with few friends, to share the cost.
To flash the microcontroller you will need popular USBasp interface. You can get one for as low as US$3 and it will serve not only this project.
| Component | Value / Model | Comment | |
| U1 | Atmel MCU | ATtiny84A-PU | DIP-14 housing |
| U2 | Voltage regulator | LP2950ACZ-3.3NOPB | TO-92 housing |
| Y1 | Crystal oscillator | 2MHz | HC49 housing |
| SW1 | Tactile SPST switch | 6×6 mm | mounting leads 6.5 x 4.5 mm wide |
| SW2 | Tactile SPST switch | 6×6 mm | mounting leads 6.5 x 4.5 mm wide |
| SW3 | Soldering pads | to solder optional power on/off switch (see picture gallery) | |
| D1 | Red LED | LED | 3 or 3.2mm LED |
| D2 | Red LED | LED | 3 or 3.2mm LED |
| D3 | Red LED | LED | 3 or 3.2mm LED |
| D4 | Red LED | LED | 3 or 3.2mm LED |
| C1 | Ceramic capacitor | 22pF | min 6V, lead space 2-5mm max |
| C2 | Ceramic capacitor | 22pF | min 6V, lead space 2-5mm max |
| C3 | Ceramic capacitor | 100nF | min 6V, lead space 2-5mm max |
| C4 | Ceramic capacitor | 100nF | min 6V, lead space 2-5mm max |
| C5 | Electrolytic capacitor | 22µF | min 6V, lead space 2.0-2.5mm, best 5-6mm high |
| C6 | Ceramic capacitor | 100nF | min 6V, lead space 2-5mm max |
| R1 | Resistor | 10K | 6.3mm max |
| R2 | Resistor | 220R | 6.3mm max |
| R3 | Resistor | 220R | 6.3mm max |
| R4 | Resistor | 220R | 6.3mm max |
| R5 | Resistor | 220R | 6.3mm max |
| R6 | Resistor | 330R | 6.3mm max |
| R7 | Resistor | 330R | 6.3mm max |
| J2 | 6-pin header | USBasp interface | 2.54mm pitch |
| J3 | 3-pin header | PWM output | 2.54mm pitch |
| J4 | 3-pin header | PWM output | 2.54mm pitch |
| J5 | 3-pin header | PWM output | 2.54mm pitch |
| J6 | 3-pin header | PWM output | 2.54mm pitch |
| J7 | 3-pin header | PWM output | 2.54mm pitch |
| J1 / BATT | 3-pin header | 4.0-8.4V | 2.54mm pitch |
| BATT | Soldering pads, 4.0-8.4V | pads to solder optional battery plug |
How to build your own servo centering tool?
Building your own MAK RC Heli Servo Centering Tool is simple. Just follow the steps described below.
The design is robust, on purpose using through hole technology (THT) and large components, so anybody with basic soldering skills could be able to build the tool.
- Download Gerber files, firmware HEX file and STL files for 3D printer (links below in Download section).
- Order or make your own PCB using downloaded Gerber files.
- Purchase required components accordingly to the Bill of Material (BoM).
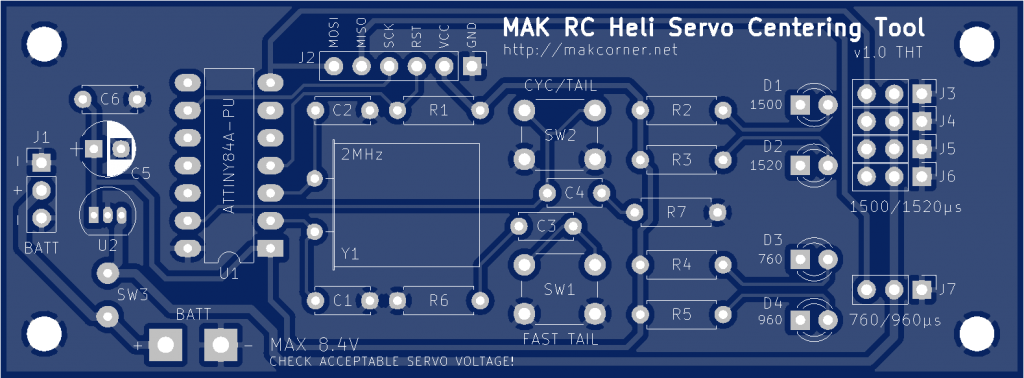
- Solder all components (carefully match reference number from BoM against markings on the PCB).
- Optionally solder SW3 switch. If you do not want to use the switch you must short SW3 pads by soldering a piece of wire (in that case the tool will be powered as soon as the battery is connected to J1/BATT or BATT pads).
- MCU (ATtiny84A) must be pre-configured for external 2MHz crystal oscillator. EESAVE fuse should be set, so EEPROM non-volatile memory is not erased every time when the flash is erased / programmed.
- Flash the MCU with the firmware HEX file.
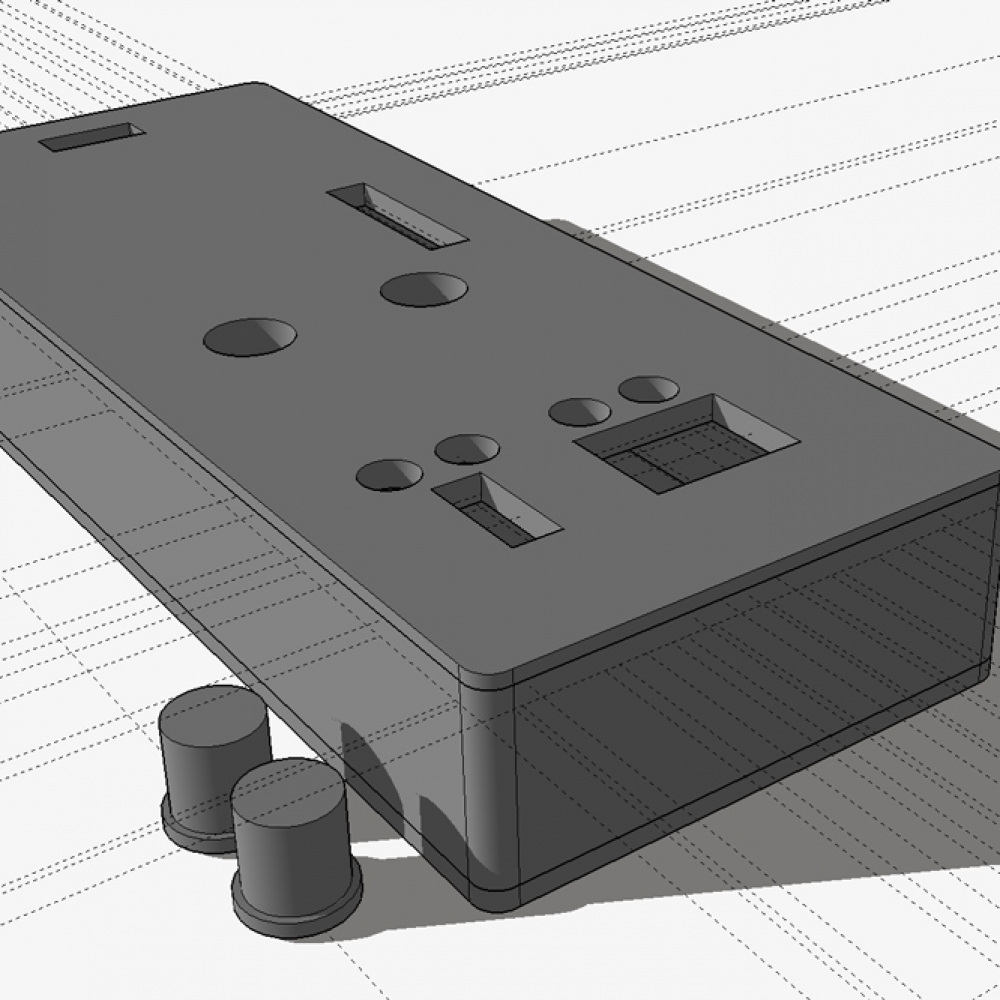
- 3D print the case and enclose the PCB (optional).
- Connect the battery. All four LEDs should blink few times in a pattern.
- Check if the settings are preserved between power cycles of the tool (selected modes should remain the same).
- Test one of 1500/1520µs ports with some standard servo (check if the servo can operate with voltage provided by the battery).
- Do the same for fast tail 760/960µs port.
- Voila! 🙂
Battery can be connected either via J1/BATT connector, or via BATT solder pads on PCB (but not two batteries in the same time).
Soldering is really straight forward, just follow the markings printed on the PCB. Pay special attention to polarity of C5 electrolytic capacitor (unlike ceramic, electrolytic capacitors are polarity sensitive). Same applies to LEDs (cathode should be soldered to square pad on the PCB), but LED will not be damaged when invertely connected – it will just not work.
How to flash the microcontroller (MCU) ?
Standard microcontroller programming tools are required to flash the firmware, i.e. USBasp and AVRdude. This is not Atmel MCU programming tutorial, so I will cover basic steps only, using popular USBasp programming interface:
- Solder all required components into the PCB. Do not connect the battery.
- Download and install AVRdude.
- Download firmware HEX file (link below, in Downloads section) and copy it into your AVRdude folder (remember to unzip first, copy only the HEX file).
- Connect USBasp to 6-pin J2 connector (RST, VCC, RST, SCK, MISO, MOSI signals).
- Execute AVRdude, to setup the MCU for 2MHz external oscillator, disable CKDIV8, set EESAVE bit:
avrdude -p t84 -c usbasp -P usb -B 8 -V -u -U lfuse:w:0xFB:m -U hfuse:w:0xD7:m -U efuse:w:0xFF:m
- Execute AVRdude, to flash firmware HEX file:
avrdude -p t84 -cusbasp -Uflash:w:MAK-RC-Heli-Servo-Centering-Tool-Firmware-v10.hex:a
- Disconnect USBasp programmer.
Search Google and YouTube for more guidance on Atmel microcontroller programming / flashing.
Downloads
- MAK RC Heli Servo Centering Tool – PCB Gerber Files v1.0 THT
- MAK RC Heli Servo Centering Tool – MCU Firmware v1.0
- MAK RC Heli Servo Centering Tool – Case for 3D Printing (also PDF with top sticker image)
Purchase
I strongly encourage you to build the tool on your own. I provided all the files for free download as well as the above quite detailed information on ordering PCBs, electronic components and building process as such.
However of you are not into soldering, programming micro-controllers or DIY in general – I may have some kits with pre-programmed MCU or even fully soldered, working tools for sale. Please message me on FB if you are interested.
License & Legal disclaimer

This work is licensed under a Creative Commons Attribution-NonCommercial-ShareAlike 4.0 International License.
The project is tested and it worked for me. However there is absolutely no guarantee nor liability behind – use on your own risk and responsibility.
Feedback
Would love to hear your feedback on this project. Let me know if you have build one. Do not hesitate to ask questions if you have any.
Please leave your comments and questions below.

I’m interested in buying three of your servo centering tools fully assembled. Can you still provide these?
Thanks!